So Here's My Life

The things we make,
the food we eat and
the shenanigans in between.

A blog about making things by
MICHELLE SEXTON

Showing posts with label kids fun. Show all posts

Thursday, April 24, 2014

Sidewalk Chalk Paint & Plastic Easter Egg Play

Do you still have a multitude of leftover plastic Easter eggs? We do over here, too. Earlier this week, I shared 15 ways to reuse plastic Easter Eggs. You should definitely check it out. We are still coming up with new ways to reuse all of these eggs. A couple of days ago, we spent a good hour painting on the sidewalk with plastic Easter eggs and sidewalk chalk paint. (BTW, I have the Sidewalk Chalk Paint Recipe, too!) The boys had a blast. Here's how it went down:


You will need:
- 2 cups of water
- 2 cups of cornstarch
- empty squirt bottles (like dish soap bottles)
- food color
- plastic Easter eggs


How to make the Sidewalk Chalk Paint:
Add the cornstarch into the water, in small increments, whisking as you add the cornstarch, until thoroughly combined. It should produce approximately 3 cups of sidewalk chalk paint. Add equal amounts of the cornstarch mixture to each squirt bottle and add about 5 drops of food color (or more if you like) and shake each bottle to combine the paint.

There are so many ways to play with the sidewalk chalk pain and plastic Easter eggs:
- Pour the paint into the eggs and drizzle it out
- Crack the paint filled eggs open onto the cement
- Shake paint filled eggs (with the holes) to drip onto the cement
- use the egg shell halves to stamp with paint or to create impressions into partially dried paint
- lay the shells down and paint over the top of the shells
- use a paint brush (or basting brush) to paint directly onto the cement.

 Mac enjoyed pouring the paint inside the Easter Eggs

Mixing the paint colors was a fun experiment 

 Pouring the paint from the eggs onto the concrete.

 Cheese scraped the paint with the plastic egg shells.
 Cheese's favorite activity was pouring the paint directly onto the concrete. (Typical toddler) 


 At this point, Cheese claimed ownership over the bottle of green paint, and became angry when he was forced to share with his brother. So, to protest, he decided to lay face-down on the painted concrete. Oh, toddlers. ;)

This was the result of his protest. The funny thing was that it never seemed to bother him to have wet chalk paint on his face. He was crying because he was angry. 


Scraping patterns into the paint. 


Super easy, potentially messy (completely washable), but plenty of fun.  

Thursday, April 17, 2014

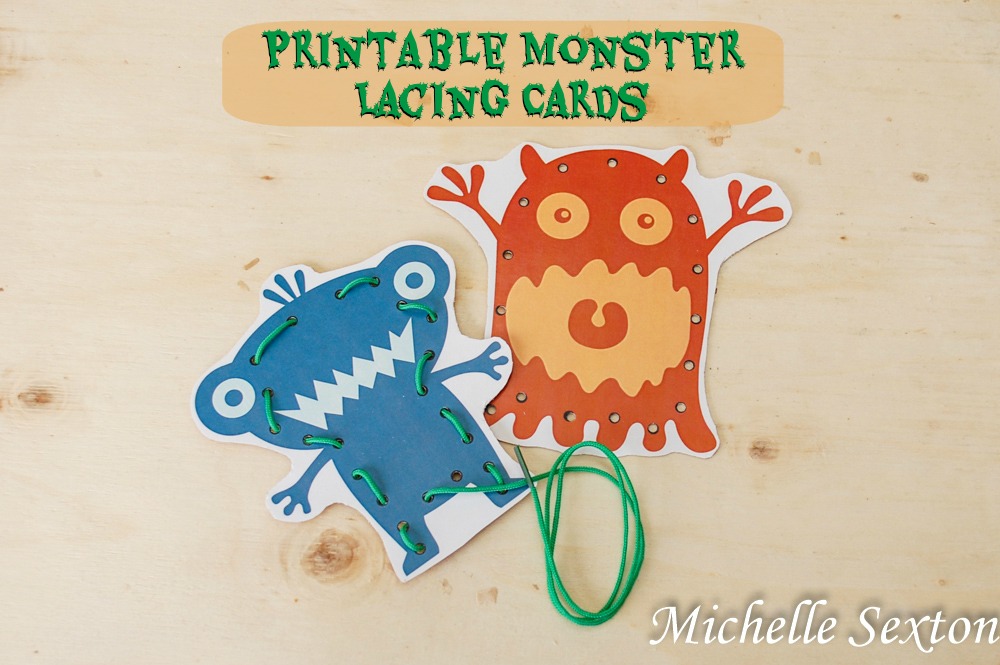
Printable Monster Lacing Cards

Does anybody have summer on the brain yet? Or are you still thinking about Spring? If you are, I don't blame you...didn't Spring just get here last week?? ;) Over the past couple of days, I've been thinking more and more about the summer. Do you have plans for summer yet? We do. Part of that plan involves taking two kids on a plane. In my mind I'm already thinking ahead and planning the activities I can bring for my boys during the plane ride. I think before our trip I'm going to go on a massive printable paper toy hunt to gather as many as I can. I am definitely going to bring along these printable monster lacing cards that I made. Lacing cards are a great way for toddlers and preschoolers to work on developing fine motor skills, but I've rarely seen them outside of a daycare or preschool. So let's make our own! But we should make monster lacing cards. Ready? Let's do it!

Make these Printable Monster Lacing Cards from SoHeresMyLife.com


You will need:
- These Printable Monster Lacing Cards
- thin piece of cardboard (like the kind on the back of a spiral notebook)
- shoe lace, yarn or string with stiff ends for threading
- spray adhesive or glue of some sort
- 1/8" hole punch (not pictured)
- scissors

supplies needed

Make them:

Adhere the Monster Printable to the cardboard with spray adhesive or glue.

Printable Monster Lacing Cards from SoHeresMyLife.com

Cut out the monsters.
Use the hole punch to press out each black circle on the monster.

Printable Monster Lacing Cards from SoHeresMyLife.com

Encourage your child to thread the shoe lace in and out of the holes in any way they see fit.

Enjoy!

Thursday, April 3, 2014

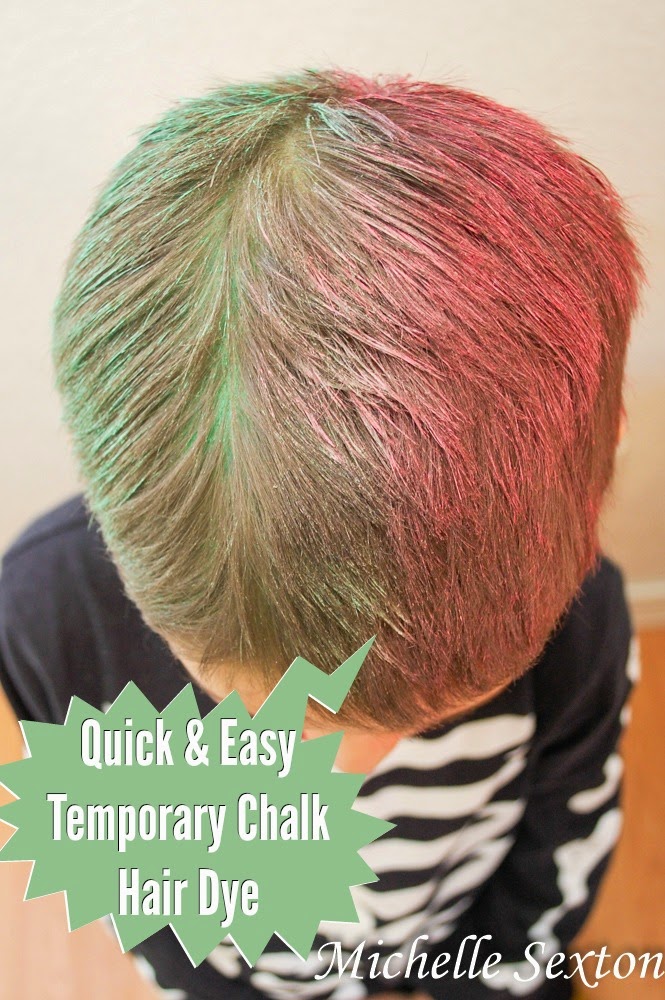
Quick and Easy Temporary Hair Dye Using Chalk

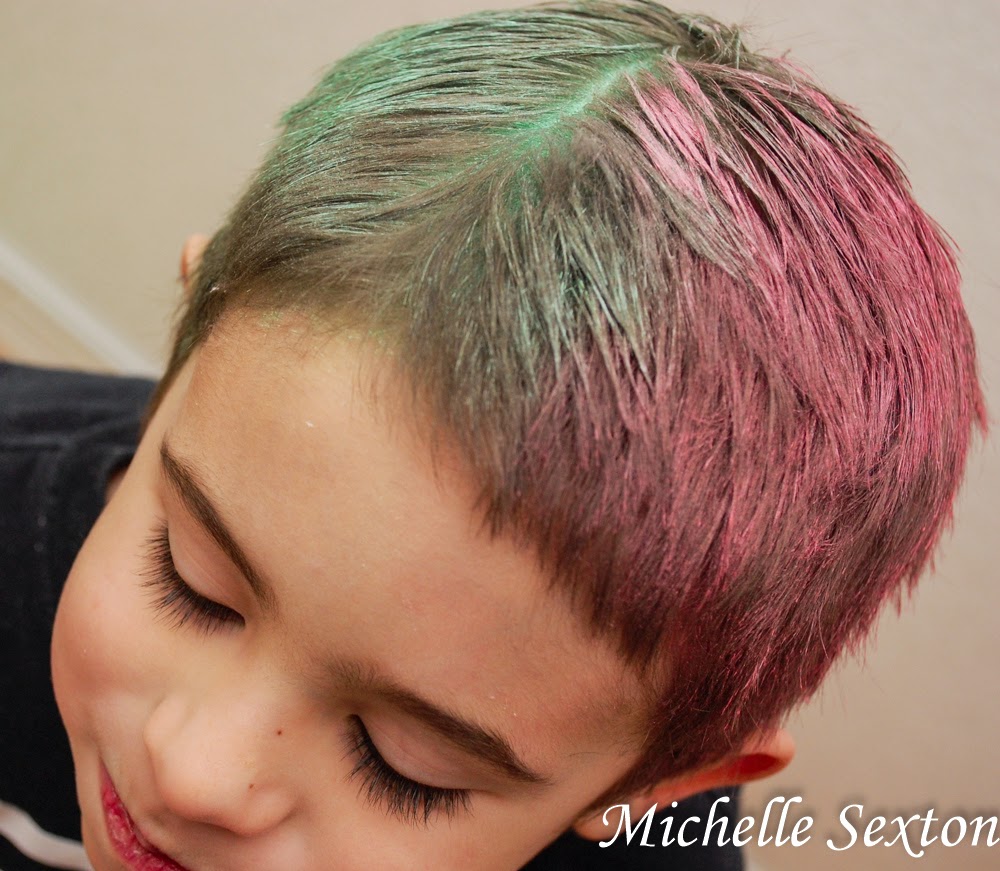
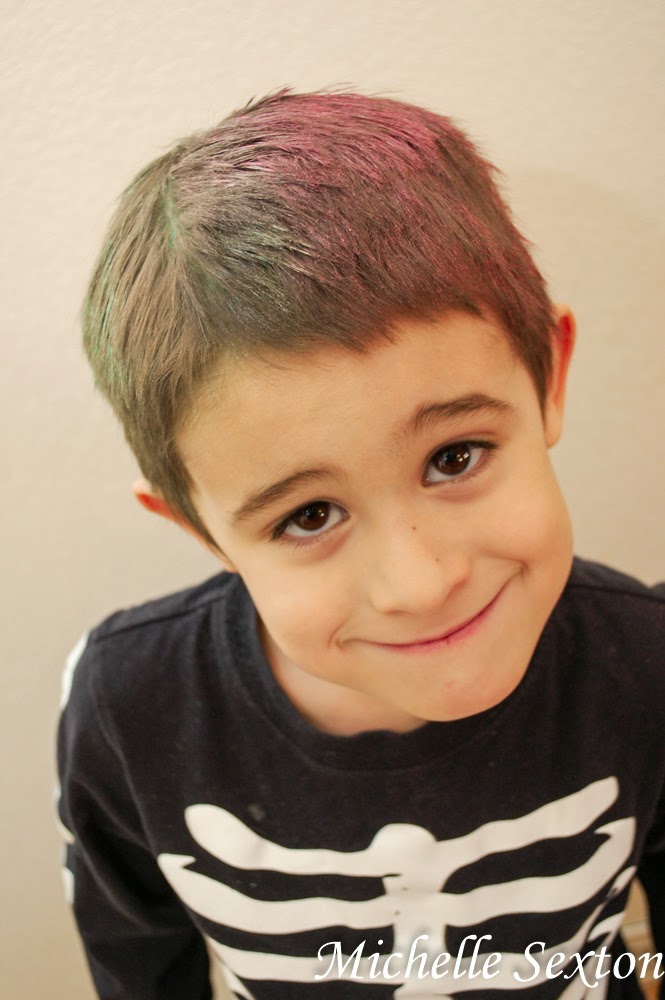
My camera is still in the repair shop, due to Mac's little shenanigan, but I've been told that it should be ready within the next couple of days. Hopefully. Geez. Children. Bah! Anyway, regardless of the fact that I am camera-less at the moment, I do have one simple project set to share. Apparently this is the perfect opportunity too, since I can't take pictures of any of my other projects! A while back Mac's school had a "Crazy Day." The kid were encouraged to dress in crazy attire for that day - backwards clothes, inside out, mis-matching shoes, you get the idea. It was truly a hysterical sight to see. Mac desperately wanted to have crazy colored hair on that day. So the night before, Joel and I searched online for a simple way to create temporary hair dye. There were plenty of ways, mostly with Kool-Aid, but after reading through a couple of tutorials, we came up with our own easier way to put temporary hair dye in Mac's hair  - using chalk & hair spray.

Quick and Easy Temporary Hair Dye Using Chalk - click through and see more @ SoHeresMyLife.com

You will need:
- Colored Chalk (we used sidewalk chalk, but colored chalkboard chalk is great too)
- Hair Spray
- Hair Dryer
- Spray bottle filled with water (recommended but not necessary)

1.Start off with lightly damp hair. (Mac's hair was dry, so we misted it with a spray bottle filled with water.)

2. Using the long side, rub the chalk over the damp hair until you are satisfied with the color saturation. (More than one coat may be needed, depending on the color.)

3. Spray an even coat of hair spray over the damp, colored hair.

4. Gently dry with a hair dryer.

Easy Temporary Hair Dye using Chalk - only takes 5 minutes. @ SoHeresMyLife.com

That's it! Unbelievably easy. The color lasted on Mac's hair the entire day, as long as he didn't touch it. However, it is chalk, so a small amount of flaking is possible. Either way, it was pretty awesome for about 5 minutes of extra work. I was definitely satisfied. :)

Quick and Easy Way to Make Temporary Hair Dye with Chalk in 5 minutes @ SoHeresMyLife.com

This would have been awesome to do for April Fools! I should have thought of that sooner. Darn it! Next year...

Thursday, March 27, 2014

Free Printable Monkey Puppets

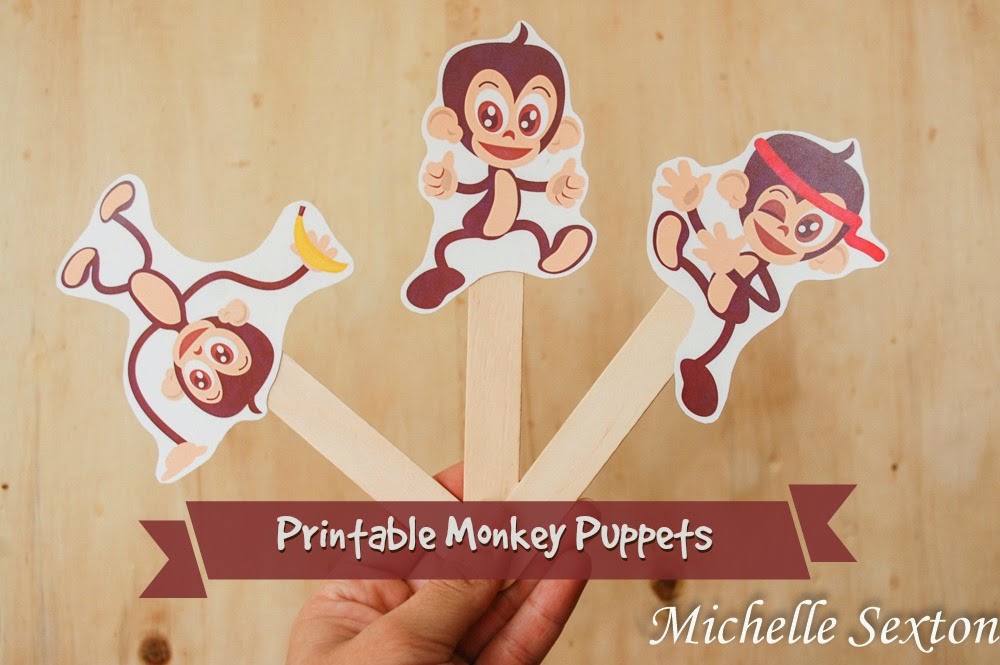
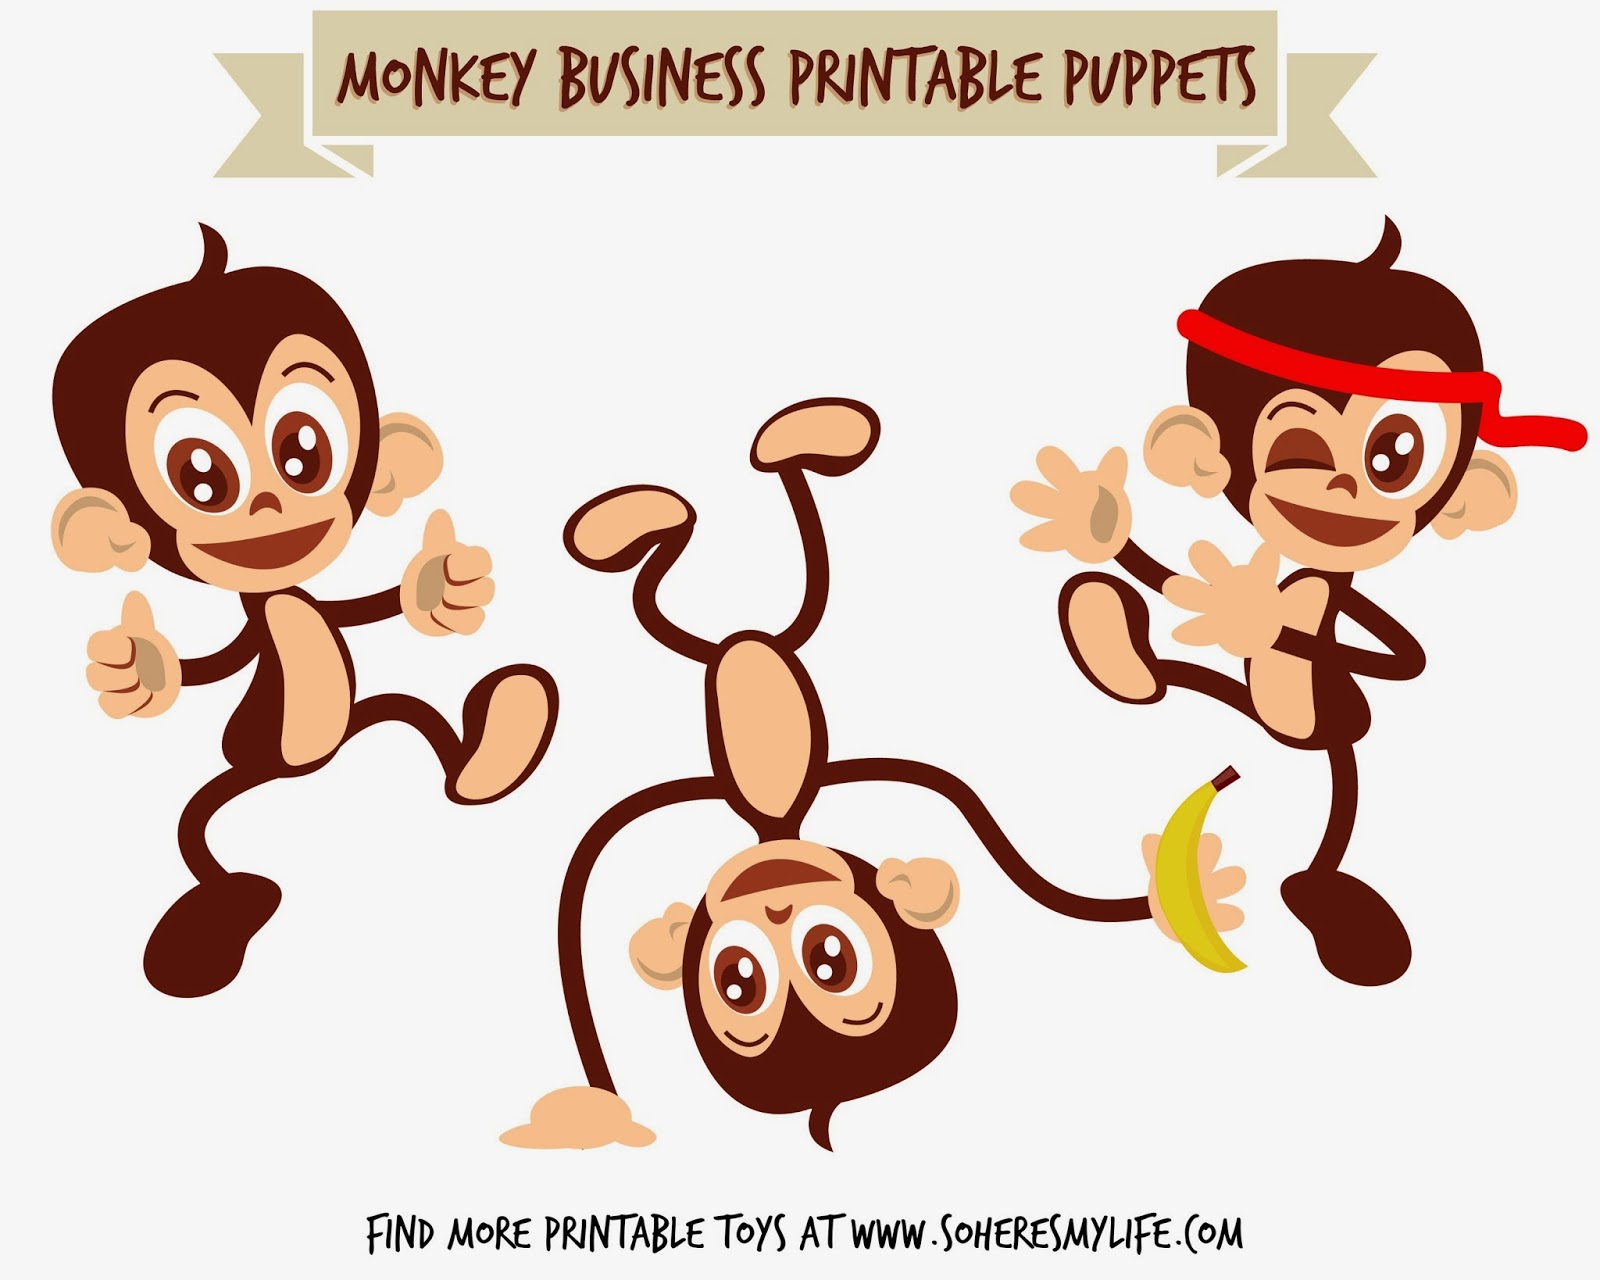
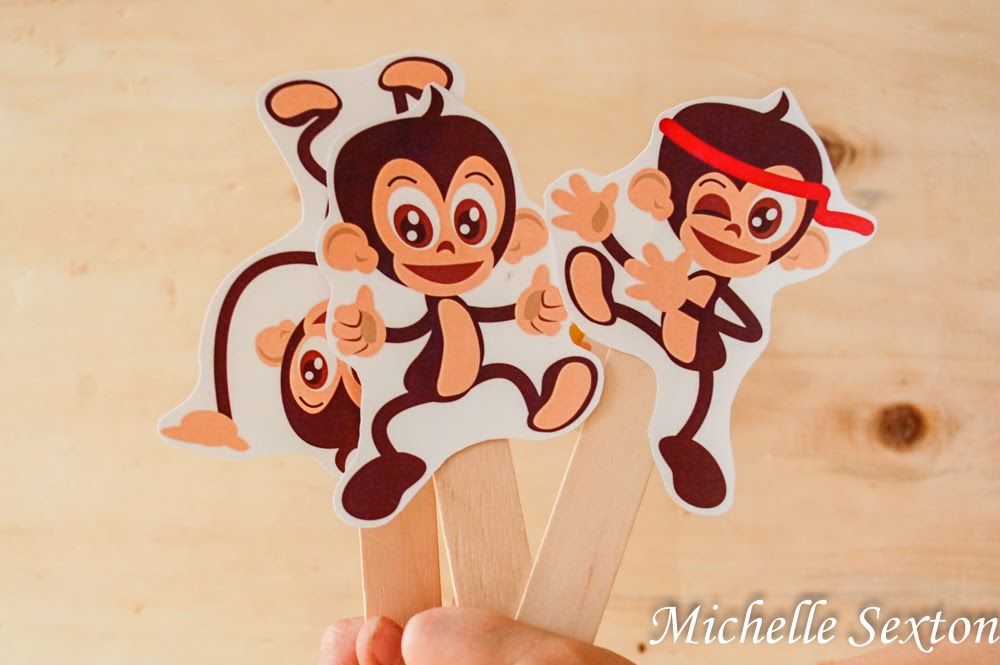
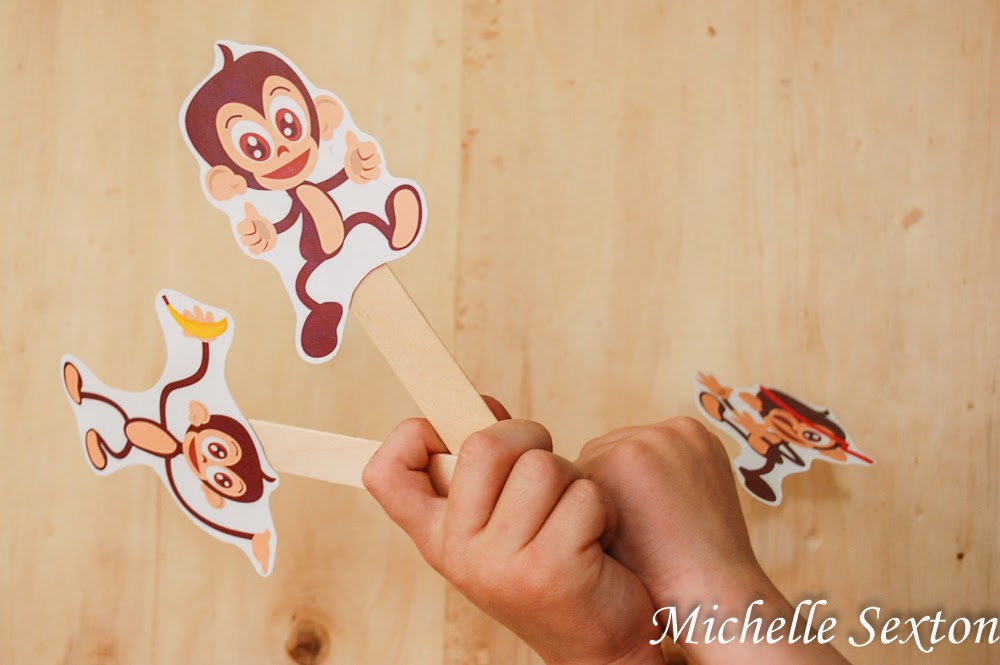
Looking for an easy paper craft for kids today? Look no further! I have an free adorable printable paper craft toy  to share - Monkey Puppets! These cute little monkey puppets are so fun, my boys could hardly wait for me to finish making them. Cheese kept point at the laptop screen and babbling toddler gibberish as I was putting together the printable. Needless to say, they could hardly wait to get their hands on them. I recommend that you print out these monkeys, assemble, hand them to your kids and fix dinner as fast as you can while they play quietly. (Because quiet moments seem to be few and far between when you have little ones!)

Free Printable Monkey Puppets - available at SoHeresMyLife.com - click through and get them

Free Monkey Printable Puppets from SoHeresMyLife.com - click through and get them

You will need:
- 3 popsicle sticks (we used the larger size)
- masking tape or glue
- scissors

Here's how we made these fun little monkey puppets:

tape puppets to popsicle sticks

Print out the Monkey Printable onto card stock. Cut out the monkeys and tape or glue the popsicle sticks to the back of each monkey. 

Free Printable Monkey Puppets from SoHeresMyLife.com - click through and get them

Free Printable Monkey Puppets - find them at SoHeresMyLife.com - click through and get them now

Free Printable Monkey Puppets - get this one and more at SoHeresMyLife.com


Play with them. 

So hard, right? Yeah, no it wasn't. Major win for quick and easy kids entertainment! 
Want another set of printable puppets? Try the Silly Shape Finger Puppets

Enjoy this printable and use it as much as you like for personal use or even in the classroom, but please remember a couple of things - 
1. If you post about this printable on your blog, always link back here. 
2. Don't pin directly to the link, but instead this page.
3. You can't sell this printable or any other printables available on So Here's My Life :)
Got it? Ok cool. 

Tuesday, March 18, 2014

12 Free Printable Paper Toys

Printable Toy Fans, Unite! I've been searching the Internet high and low to find a variety of fantastic printable toys to make with my kids. The problem that I came across was that several printables came with a small price tag. I'm not against paying for things (especially if they are awesome), nor am I against those who use their amazing talent to gain an income, but I do like FREE STUFF. So, I sifted through numerous sites and found an awesome collection of 12 Free Printable Paper Toys for both girls and boys. Rejoice with me, friends!

12 Free Printable Toys - click through and find them!


Bird Finger Puppets from Mr. Printables

3D Paper Lizard from Skip To My Lou

Spiderman from Mini Paper Craft 

Papercraft Alphabet from Digit Prop

Elastic Powered Duck from Creative Park


Angry Birds from Little Plastic Man

Paper Owl by Craft and Creativity

Paper Dolls from Weelife

Puppies from Paper Replika

Snake Finger Puppets from Mr. Printables

Robot from Lou Lou and Tummie

Looking for more? Joel and I have started making a nice little collection of our own. Check out the Paper Animal Rings, Silly Shape Finger Puppets, Printable Train Tracks, Jack-In-The-Box, and the Printable Roads. I also have a board on Pinterest dedicated to a large variety of printable projects. 

Tuesday, March 11, 2014

Onesie Decorating with a Stencil - There's A Nap For That

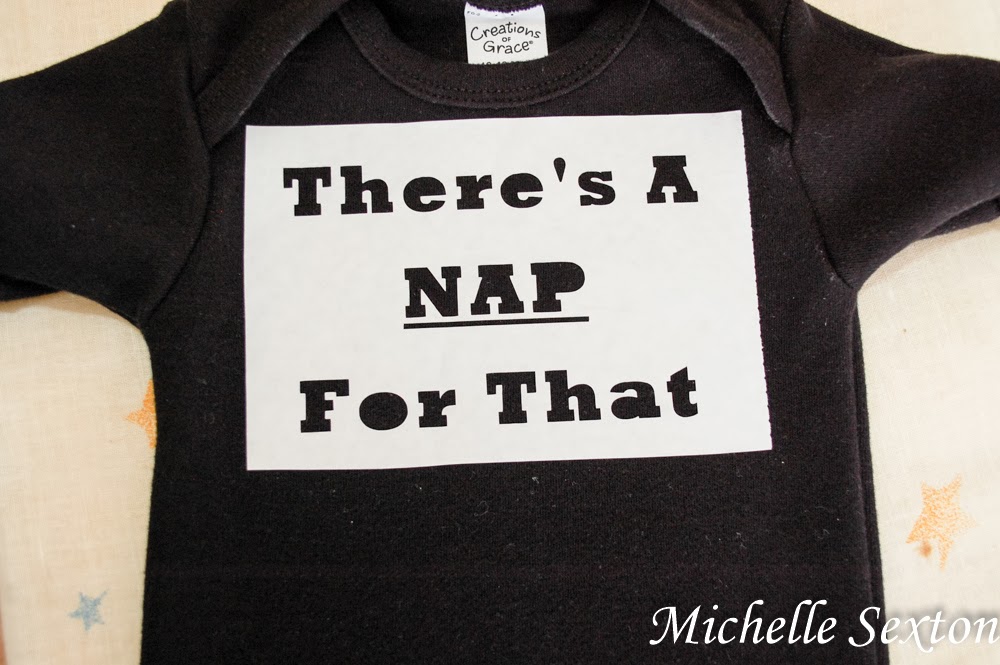
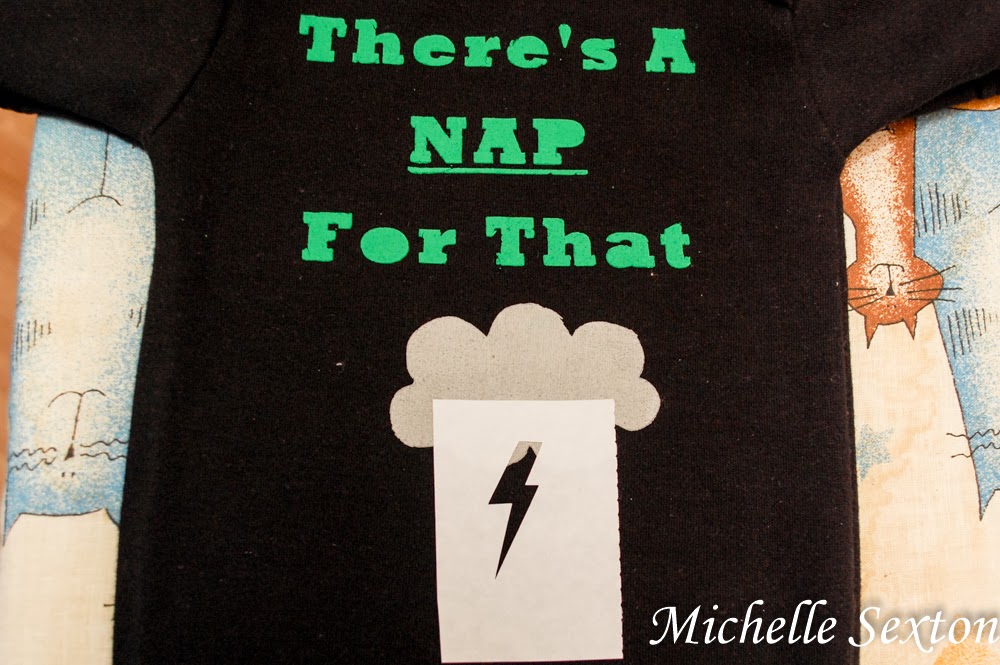
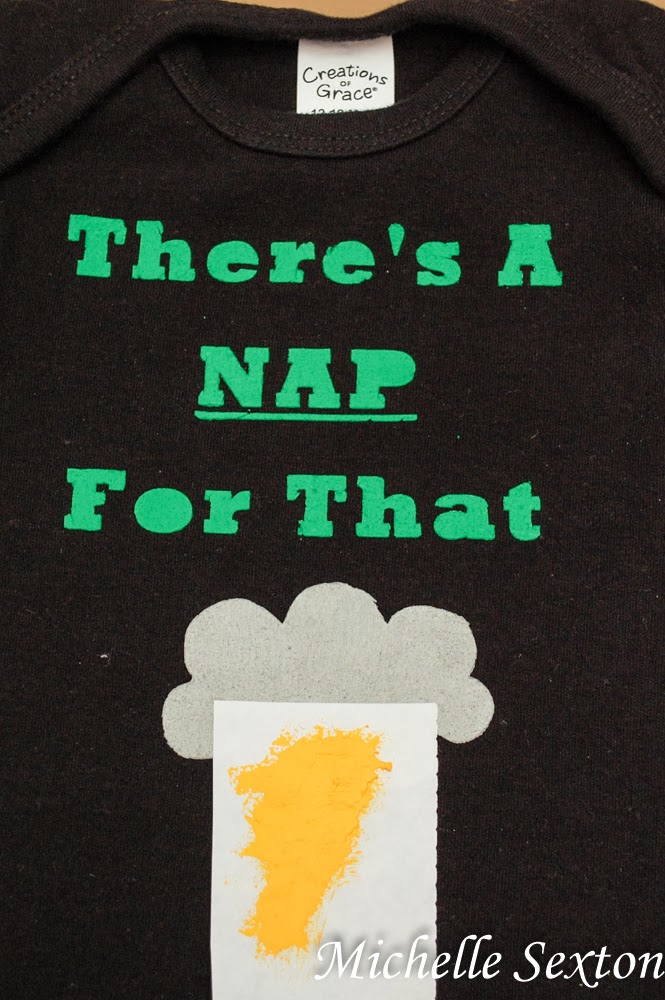
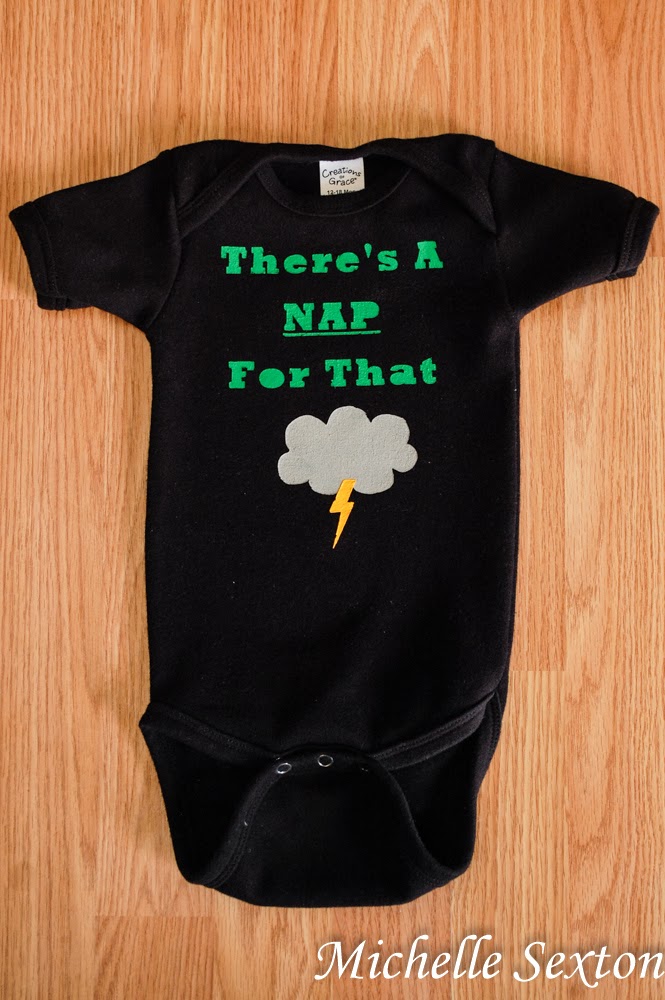
If you follow me on Instagram, you may have seen this photo pop up recently. We painted onesies for the mother-to-be at a friend's baby shower recently. Yeah, I know: genius! Why didn't we think of doing this sooner??? So anyway, after scrolling through Pinterest to gain a little inspiration, I came across the phrase, "There's A Nap For That." "How perfect is that?" I thought. And so, I painted a onesie with that phrase, and added a thunder cloud and a lightning bolt. I loved it so much, I decided that I REALLY needed one of these for my own munchkin. So, I put together a stencil pattern in Silhouette Studio (the program that came with my Silhouette Cameo) and had the Cameo cut it out using freezer paper. Super easy. Do you want to make one too? Awesome. I knew you did. Wait, you don't own a Silhouette? No worries. I've also included a way to make this hysterical onsie without a Silhouette, too. See? I've got you covered.

Decorate a onsie with a freezer paper stencil using a Silhouette, or cut it out by hand. This tutorial provides the file to download this stencil as well as instructions on using freezer paper. Click through and learn how.

Oh wait, did you guys even know that I have a Silhouette? I do! You want to hear the terrible part? We bought it about two and half years ago, but I haven't used until a couple of weeks ago. Gasp! I know! The reason I hadn't used it until recently was due to the fact that it was purchased about a month prior to the day Cheese was born. I had serious pregnancy brain back then and there was no way I could think about anything creative. Yeah, so my husband used it a couple of times to create a couple geeky role playing games and it got set aside until recently. Such a sad story, but the good part is we are back in Silhouette business now! Woo hoo!

Supplies needed:
- onesie
- fabric paint or acrylic paint (I used acrylic)
- sponge brush
- freezer paper (one 8" x 8" square)
- Silhouette (or printer, exacto knife, and cutting mat/board)
- iron

Ok, friends, you have two ways to make this: with a Silhouette or with just a Printer. Obviously, if you don't have a Silhoutte, you should go for the printer option.

If using a Silhouette, download this file. Place the sheet of freezer paper onto the cutting mat, shiny side up. Cut the freezer paper using the Silhouette. Carefully peel the freezer paper stencil off the cutting mat, making sure not to tear the freezer paper.

If using a printer, download this PDF and print it. Tape the printed template onto a cutting mat, place the freezer paper (shiny side down) over the printed template and tape it down as well. Using an exacto knife, cut around the printed letters and shapes to create a freezer paper stencil.

Use a freezer paper stencil to decorate a onsie - click through and get to download this stencil

Use freezer paper to paint a shirt - click through and learn how

Ok. So, at this point, you should have a super awesome freezer paper stencil that was either cut with the Silhouette or by hand. It should look like the one in the photo above. Cut the cloud, lightning, and letters into three separate sections.

use an iron to adhere a freezer paper stencil to fabric

How to iron a freezer paper stencil on to fabric

Arrange the letters and cloud freezer paper stencils (shiny side down) on top of the onesie and iron with dry medium heat until the freezer paper adheres to the fabric. Be sure to iron over all the corners and small cuts. (Side note: I hate small intricate details, so I chose not to use the center cut outs for letters the R, A, P, and O. However, if you prefer to use the center cut outs for the letters, go for it and iron those on! P.S. I admire your patience!!)

Place a piece of cardboard inside the onesie, underneath the stencil area, to prevent the paint from bleeding through onto the backside. (I didn't actually do this, because I forgot. I totally lucked out because the onesie fabric was thick enough to not allow paint to bleed through.)

Decorate a onesie with a freezer paper stencil

Using the foam brush, paint a thin and even layer over the letters and cloud in an up-down motion. (Side-to-side motions tend to make the paint seep underneath the stencil.) Avoid painting a thick layer of paint over the stenciled areas. Leave the stencil on the fabric and allow to dry. Add additional coats, if needed.

Once the paint is completely dry, gently and slowly peel the stencil  freezer paper off the fabric. Press your fingers on the the painted shapes and letters as you peel the stencil from the fabric to prevent the paint from peeling up, also.

How to decorate a onesie with freezer paper - easy tutorial

There's A Nap For That Onsie Tutorial

Gently iron the lightning bolt freezer paper stencil to overlap at the bottom of the cloud. Paint the lightning bolt and allow to dry completely before removing the stencil from the fabric.

So much fun, right? I had a ridiculous amount of fun making this onesie. I could hardly wait until the next day to put it on Cheese!

There's A NAP For That - decorate a onesie. This tutorial also provides the Free file to download to create this with a Silhouette as well as a PDF to create it by hand!

There's A NAP For That - Learn how to decorate a onesie like this with Freezer Paper - tutorial also includes a Silhouette file as well as a PDF to create this stencil by hand

P.S. If you don't have a Silhouette Cameo, but you'd like to get in on the stencil-creating fun, Amazon has a great deal on a Starter Kit Bundle for under $300!  This awesome tool can be used to create custom vinyl wall clings, cool printables for the kids and you can even swap the blade out for really awesome glitter pens and stuff to make super-creative crafts.

Please remember that you're free to use the ideas and materials in this blog for your personal use, but not for commercial use.